
Creating the Hearthstone Inn
- Alex
- Sep 16, 2019
- 5 min read

Updated: Sep 17, 2019
After our son requested a Hearthstone themed birthday party, we set about determining how best to replicate the games signature tavern experience.


For years, we have always themed our kids birthday parties. We've had steampunk, Minecraft, 80's and more, but one thing has remained a common trend. Each year we've raised the bar. Never has it been more evident than our son's request for a Hearthstone party.
For those of you unfamiliar with Hearthstone, it is an online collectable card game by Blizzard Entertainment, based upon their warcraft universe.

Welcome to my inn! Busy night... but there's always room for another! ~Harth Stonebrew, The Innkeeper
In Hearthstone, players are all patrons of Stonebrew's tavern and inn, where they pull up a chair at one of the many tables and play a magical game of cards against other patrons (online players). The Inn has thus become a hallmark of the games style, with Blizzard even going as far as recreating it for live events.
After some research, we decided to create our own "Inn" and host our own Hearthstone Inn-Vitational.

Recreating the Inn:
As we began brainstorming, we outlined 4 key parts of the build that we felt were critical to create the vibe we were going for. While we added more on later, these 4 items formed the foundation of the experience.
Wood Framework
A Hearthstone Center Piece
Excessive Boxes and Barrels
Candles, Lots of Candles
Alex measured and sketched out the living room and dining room that would form the core of the experience and quickly mocked up some rough visuals for us to begin working with.
Once happy with the look, it was time to start building the wooden framing.
Wooden Framing:
For the framework, we knew that wood was not only going to be a costly direction, but also create challenges when attempting to hang and mount around the room. Instead we decided to create faux wood using 1"x4'x8' extruded Polystyrene rigid insulation sheets.
Found commonly at hardware stores, a hot knife allows you to cut and carve these sheets with ease, but I highly suggest using a mask and working in a well ventilated area. To keep with the cartoonish vibe of the game, we purposefully exaggerated the wood grain that we carved into each board. When carving wood, don't be afraid to add knots, loops, and other curving shapes! Making each board unique really adds to overall look and feel. To add a little character and weathering to each board, we also scratched the surface with a metal brush.
Once carved, we used watered down black paint to really pull out the wood grain (You can do this after painting with an ink wash, but we made the decision not to seal the foam before painting and were worried we wouldn't be able to wipe up the excess). Over this we brushed a layer of flat brown interior paint, spending extra time to ensure none clumped into our wood grain. Once dried, we felt the boards still felt a little flat, so we took a trip to a few hardware stores and dug around the mis-matched, or mis-mixed paint section for other browns. If you haven't checked this area of your local store out, we highly suggest you do. If you aren't picky about exact colors, you can get incredible paints for 80-90% off.
With these, we dry brushed on three different colors to each board and went over it all with a liquid wood varnish we found. Combined, this really gave us the texturing we were looking for! Time for install!


Barrels and Boxes:
With the framing complete, we got to work on creating a Hearthstone Centerpiece (the iconic gold star with the blue hearthstone swirl in the middle), some wooden barrels, and a whole lot of candles.
For the barrels, we followed an online tutorial showing how to cut cardboard into strips, fold it, and tape it together to create the shape. I'll tell you right now, it isn't as easy as it sounds. In fact, we made three barrels before Kris swore she would never make another barrel again. Sooo, we have three barrels and lots and lots of crates!
Many of the crates we found on clearance at Michael's and simply put a coat of wood stain on them to create a darker, more weathered appearance. However, we wanted to make one of the crates a beverage cooler, which required a different approach.
We started with a white, styrofoam cooler, and repeated the same process as our wooden framing. Carving fake boards and wood grain into the cooler before painting it in a similar wooden color. We added additional straps and rivets to give it a bit more character.


Candles, Candles, Candles:
We had initially planned on buying a bunch of battery operated candles and putting them around the house, but after picking a few up, we quickly realized how fake and plastic looking they were. To spruce things up, we bought a bunch of real tapered candles and proceeded to drip wax all over our battery powered candles. By the end, we modified over 40 candles in a variety of sizes for the event.
When doing this, make sure to really build up the ridges of the candle and then let it drip down the sides! It is also rather messy. Put down cardboard or do it over a hard surface where you can quickly wipe up excess wax.


The Center Piece:
The last of our core build pieces was the iconic Hearthstone symbol. We wanted this to prominently be displayed above the fireplace to tie everything together. We leveraged pink insulated foam boards again for this, projecting and tracing the image before carving it with a hot knife.
Once complete, we needed to achieve the bright golden color showcased through the game. While an airbrush is on the future buy list, for this build we opted to use a gold spray paint. A warning! Always make sure to seal any foam builds before painting this way. Aerosal sprays dissolve foam. We used the easy to acquire Mod Podge.
To finish it off, we painted the center blue and highlighted it with an iridescent white. A simply picture hanging bracket was glued to the back for mounting.
This was the first time we tried carving a multi-depth image into a piece of foam and we learned a lot from it. As you can see, several of the angles and ridges were simplified out of the design, but looking back now, we probably could have captured them if we carved and stacked multiple thiner layers of foam. For this though, it worked well enough.


Scope Creep:
The problem with creating such a fun atmosphere, especially within a lore that we are already familiar with, is wanting to keep doing more. Once the core parts of the build were finished, late night conversations or thrift store finds kept us busy for significantly longer than we originally planned.
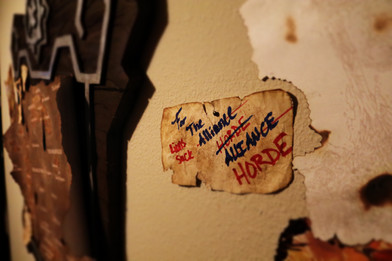
Additions:
Quest/Map Board
The Iconic Hearthstone Inn Windows
Lots of weapons
A rustic (and dangerous looking) target board
Wrought iron chandelier (yay for facebook marketplace!)
Horde and Alliance Banners
Horde Table Runner
A 3D printed and hand painted Hearthstone Box
A Sign for our Inn (The Angry Chicken) - Design borrowed from the Hearthstone Podcast, the Angry Chicken! Check them out!
If you are interested in learning how we made any of these additional projects, let us know and we'll write a follow-up post, but for now, enjoy the image gallery below!


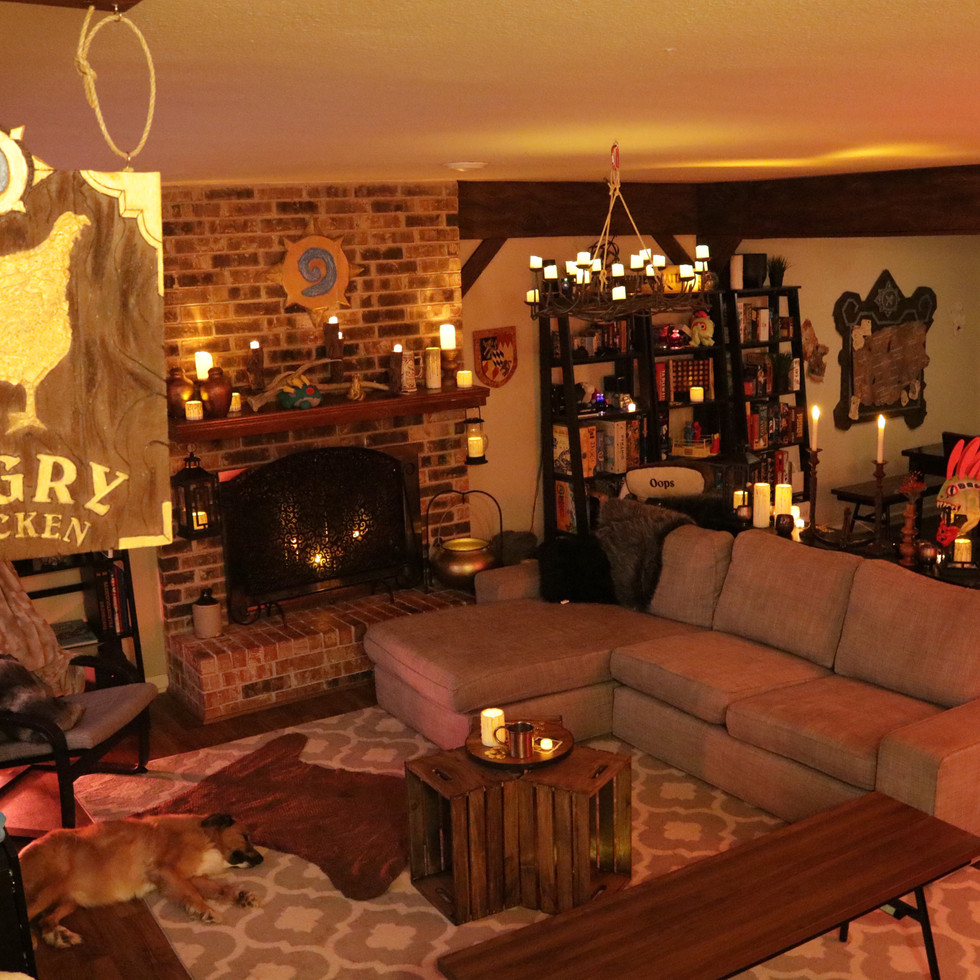
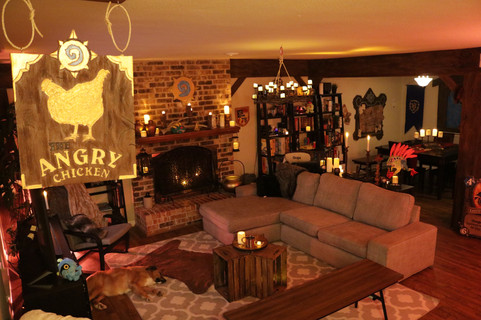
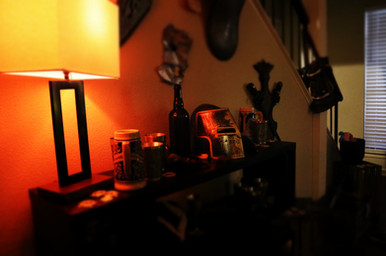
The Final Touches:
In the final week leading up to the event, we gathered bottles, toys, sculptures and other items to fill in the spaces of our inn. Adding life and depth to it. Around each corner are little curiosities to find and explore. While these added some extra cost, I found it really creating the homey, by the hearth, type feel we were going for.
The night before the event we set everything up, put it through a test run, and captured a few photos to commemorate the moment. Hope you enjoyed our build and until next time, Job's Done.


Comments